fbpx

การใช้ Vuex กับ Nuxt Js Part1

การใช้ Vuex กับ Nuxt Js Part1

สวัสดีครับ Blog นี้เป็นการบันทึกการเขียนเว็บไซต์ด้วย Vue js นะครับ บางทีผมก็หลง ๆ ลืม ๆ เลยเขียนไว้อ่านและเผื่อเพื่อน ๆ ท่านไหนต้องการศึกษาก็เข้ามาอ่านได้ครับ

ติดตั้ง Vuex

npm install vuex --save

หรือว่า

yarn add vuex


ก่อนที่เราจะทำขั้นตอนต่อไปเรามาดูว่าส่วนประกอบของ VueX มีอะไรบ้าง ซึ่งการทำงานของ VueX จะตามรูปภาพด้านล่างนะครับ

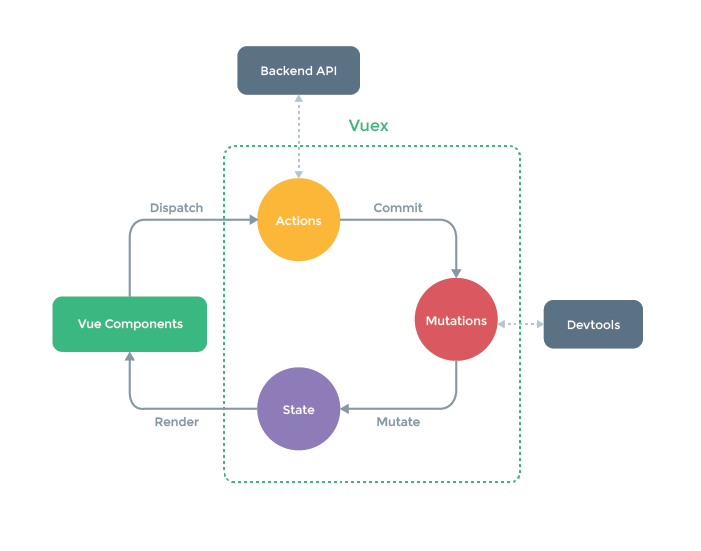
action  ถ้าเทียบกับ Vue คือ คำสั่ง  methods จะเป็นส่วนของการรับคำสั่ง หรือว่าทำงานเพื่อให้ได้ข้อมูล หลังจากนั้นจะส่งข้อมูลไปยัง

Mutation เป็นการเปลี่ยนข้อมูลของ state

state หรือว่า data จะเป็นที่เก็บข้อมูล

getters เทียบกับ Vue คือ compute จะเป็นคำสั่งให้ทำอย่างใดอย่างหนึ่งก่อน แล้วค่อยเปลี่ยนข้อมูลใน state เช่นรับค่ามาเป็นอักษรตัวเล็ก ให้เปลี่ยนเป็นตัวใหญ่ทั้งหมดก่อนส่งเข้า state


มาเริ่มที่กันเลย

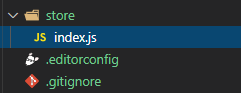
หลังจากที่ install เรียบร้อยแล้ว ให้สร้าง folder store -> file index.js

สร้าง State เพื่อเก็บข้อมูลกันก่อน

ไปที่ index.js ที่เราสร้าง folder store ไว้

ใช้คำสั่ง

export const state = () => ({
counter: 0
})

เรียกใช้ข้อมูลจาก state ผ่าน Components

มาที่ไฟล ์ index.vue

เราจะเรียกข้อมูลจาก state ด้วยคำาสั่งต่อไปนี้

<template>
<div>
  <div>Counter is : {{$store.state.counter }}</div>
</div>
</template>
<script>
import { mapState } from ‘vuex’
export default {
  // fetch(context) is called by the server-side
  // and before instantiating the component
  fetch ({ store }) {
    store.commit(‘increment’)
  },
  computed: mapState([
    ‘counter’
  ]),
  methods: {
    increment () {
      this.$store.commit(‘increment’)
    }
  }
}
</script>

เปลี่ยนแปลงข้อมูลด้วย Compute

เพื่อไม่ให้สับสนผมของเริ่มตรงกระบวณการ action นะครับ ซึ่งเพื่อน ๆ สามารถเลื่อนดูภาพด้านบนได้นะครับ จาก action >mutations > stat


ซึ่งผมขอยกตัวอย่างที่นิมยมกันคือ บวกเลขที่ละ 1 เมื่อกดปุ่ม

มาที่ index.vue ผมจะเพิ่มปุ่มบวกเลข และส่งข้อมูลไปยัง mutations เพื่อเปลี่ยนแปลงข้อมูล state ก็จะได้

<template>
<div>
  <div>  Counter is : {{$store.state.counter }}</div>
  <div> <button @click=”increment”> Add data</button></div>
</div>
</template>
<script>
import { mapState } from ‘vuex’
export default {
  // fetch(context) is called by the server-side
  // and before instantiating the component
  fetch ({ store }) {
    store.commit(‘increment’)
  },
  computed: mapState([
    ‘counter’
  ]),
  methods: {
    increment () {
      this.$store.commit(‘increment’)
    }
  }
}
</script>
เสร็จสิ้นกระบวณการของ action จากนั้นเรากลับมาที่ไฟล์ index.js เพิ่ม code เป็นดังต่อไปนี้

export const state = () => ({
  counter: 0
})
export const mutations = {
  increment (state) {
    state.counter++
  }
}
ก็จะได้ App ออกมาดังนี้
เมื่อเรากดปุ่มตัวเลขก็จะบวกขึ้นไปทีละ 1


เข้าสู่ระบบ